- 3 Minutes Wednesdays
- Posts
- 3MW (AI Chat-Bots With R, {shiny} & {elmer})
3MW (AI Chat-Bots With R, {shiny} & {elmer})
Guten Tag!
Many greetings from Munich, Germany. In today’s newsletter I want to show you how I built this AI chat-bot with {shiny} and {elmer}.

Since this has a lot of moving parts, I try to be specific about the trickiest parts and only go broadly over some of the not so important parts. You can find the full app code on GitHub.
Batch vs Streaming
Last time, we learned how to use the {elmer} package to chat with ChatGPT like so:

When you execute this thing, you’ll see that the console waits for the reply for a second and then gives you the whole reply all at once.

This is not particularly nice when you want to use this functionality in a chat bot. You don’t want to have your user wait a few seconds, do you? That will be bad user experience for sure!
Instead you can stream the response as it become available. For that, you don’t use the chat() method of our chat object but the stream() method.

Well, that didn’t work as expected. We didn’t get a chat message back. Instead, all we have is a function that seems to be a “<generator/instance>”. Uhhhh ominous!
But don’t be afraid! The Posit gods created the {coro} package that can deal with such a thing.

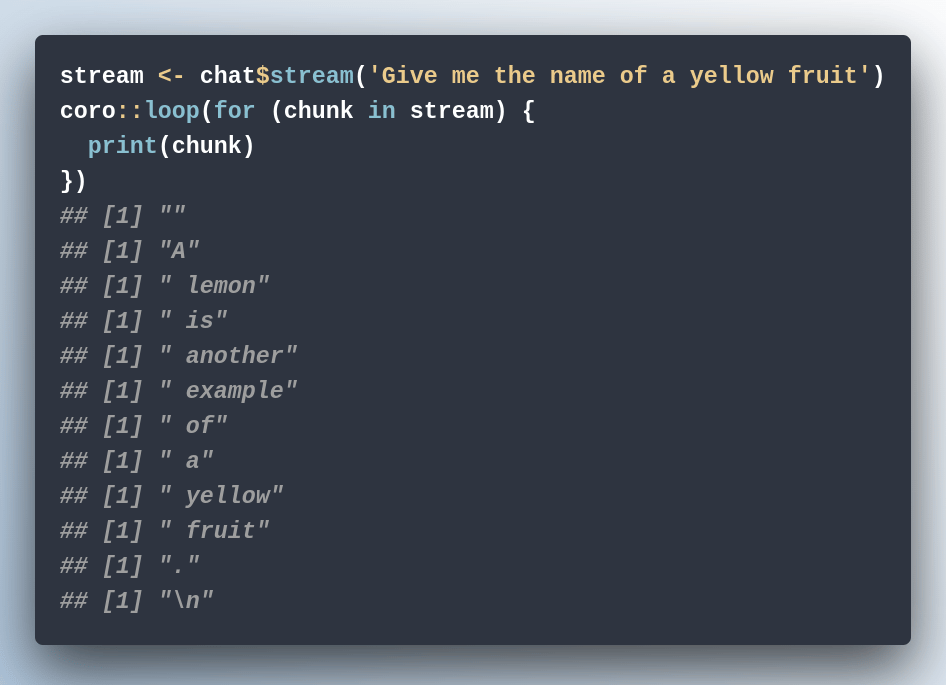
All we have to do is to save this generator and then use coro::loop() to actually stream the results. And the nice thing is that inside of that function we just have to use a regular for-loop.
This way, we can iterate over all the chunks that our stream delivers. For example, we could simply print it to the console to see each and every bit on a new line.

See? All of these things appeared separately. And if you use the cat() function instead of print(), they will even be printed like a text instead of one line each.

And for prompts that require longer answers, you can even see this evolve nicely.


A Shiny template
Nice! We now have the LLM tools we need to create a chat bot with Shiny. Let’s create a skeleton app.
What we need inside the UI is a div() container into which we nest
another
div()container to hold the chat history andone more
div()to contain the input area.

Now we, can style the the container a little bit so that we can actually see things. Even if there is no content yet.


Okay nice! That’s a round-ish area to hold everything. Time to include the first output.


Here, I’ve filled the chat_output div with a new div container. And I’ve even added a chat_reply class for styling. But since that isn’t defined yet, it doesn’t look nice yet. Let’s change that.


Adding the input area
Now it’s time to include the stuff for the inputs. That includes two things:
A textarea input
A button to send the message
For both elements, shiny has prebuild elements. So let’s put them side by side inside of the chat_input area. For that, we’ll have to make that div() into a flexbox.


Setting margins and heights
The input area doesn’t look particularly nice, does it? The reason for that is two-fold:
We haven’t specified a specific height for the
chat_outputcontainerThe textarea uses some margin via the
.form-groupclass that is standard in Shiny.
We can fix both things by adding more styling. And while we’re at it, we can also make sure that the chat_output will scroll if it is filled with chat messages.


Set up the server
Nice, we have the UI template done. Or rather we have it in a good enough shape so that we can worry about the server now.
First, the server needs to set up a new chat with {elmer}. And then we need an observer. This observer will
use
insertUI()to insert the text input inside a newdiv(),create a chat stream,
use another
insertUI()call to create a newdiv()container for the LLM reply, and thenuse
insertUI()again to fill the lastdiv()container with the actual response from the stream.
But let’s do this one step at a time.
Insert inputs
Let’s first modify our server to create the stream and insert the input text box.


Styling the inputs
Notice that all boxes are below each other. With a new CSS class chat_input we can change the color and the alignment of our inputs. Inserting this into our UI…

…and then modifying the class inside the server function

…will give us the desired results:

Add a response container
Similarly, we can use insertUI() to insert a placeholder for the LLM response.


Stream the LLM response
We can now use our code from before to iterate over the stream. This time, we simply insert texts into the last chat_reply text box with insertUI().


Niiice! This is a solid first draft. Next week, I'll show you how to make sure that the LLM response is formatted nicely and the included Markdown is rendered properly.
As always, if you have any questions, or just want to reach out, feel free to contact me by replying to this mail or finding me on LinkedIn or on Bluesky.
See you next week,
Albert 👋
Enjoyed this newsletter? Here are other ways I can help you:

.png)

Reply